Wednesday, November 12, 2014

5 Things...The Crafty Challenge

Recently I shared with you the 5 things challenge that my friends Mel and I were working on. She accepted my challenge and put her 5 things to excellent use. Please check it out, she created some stunning ribbons.


These are the items I was given to work with. 

So I decided to begin with the box that these items came in as my base. I cut it and glued the tabs. My intention was to create a floating display box.  

And now for some color!!! I started with yellow as my base color. Then I glued down my first item the printed tissue paper.   (ITEM #1 TISSUE PAPER)

I added more color.  I used a shade of pink and some teal color acrylic paint and a splash of lime green here and there.   These seem to be my go to colors. 

While my base dried.  I cut up the coffee filter to make some roses.( ITEM #2 COFFEE FILTER)  I also had a red filter which I used to create a heart. 
The heart.


I then grabbed the playing cards which had some vintage people on one side. I decided to use the back side of the cards. I'm not big on old random pictures of strangers, they kinda creep me out. 

I created some wings I then embossed with some turquoise for some interest. (ITEM #3 PLAYING CARDS)

I then moved onto the embroidery transfers I was given.  I noticed that the pictures were of dancing plates and cups. I was stumped for a bit, then I realized that the faces had lots of potential.

I picked a face and used it to create my angel girl.  This was fun. My face was from a tea cup I kept the brim as a halo and drew on my hair. I then cut out the bits I didn't need. I colored and painted her. I glued her onto some watercolor paper, which I then added some more of that awesome printed tissue paper.  (ITEM #4 EMBROIDERY TRANSFERS) 

For my final item I took the Popsicle sticks and used some dylusions lime green ink to add some color to them. (ITEM #5 POPSICLE STICKS)

Then it was time to put it all together. My angel.

A message on the sticks " guide my heart, my way".

My completed project. This challenge was so much fun! I can't wait to do it again. It's such a great way to see your items used through someone else's eyes. 


Friday, October 31, 2014

Stamp Carving week day 5

Today has escaped me so I decided to do a quick stamp that I can pair up with my punch. I punched out a stamp using the fiskar large postage  stamp punch. I then traced it and carved away.

 My intention is to be able to stamp some faux stamps.
Happy Friday! Thank you for joining me this week as I carved my way through. 

5 Things.... A Crafty Challenge

I few months ago I came across Karen Kavett's youtube video for Rejected Craft Supply Challenge, I thought that this was a great idea.  So, I recruited my friend Mel from A Mynah Production long for this artful ride. We decided to swap out 5-6 items and see what we could create with them. We can create one item or multiple items the main rule is just to use the items sent. This is a great way to pass along some art supplies from your stash...because lets face it... we're all hoarders! I'm sure I'm not the only one with boxes of things that "would make some great art!"  What better way to see it turned into art than by passing it along and challenging a friend to an "Art Off"

My 5 Things Challenge items:


I have some popsicle sticks, a couple of tins, dyed coffee filters, vintage playing cards, embroidery transfers and some tissue paper. I also included the card which is just perfect for this project. 
"Begin Anywhere" 

Please stay tuned as I come up with a plan for my goodies.  

Want to play along?  Find a friend or two and challenge them.

Thursday, October 30, 2014

Stamp Carving week Day 4

I've done a few of the large erasers and thought that maybe I might give the regular eraser a go.

So, this time I drew onto my regular eraser.

Using my smaller blades I carved around my outline then worked on the inside detail. 

I inked and tested my stamp. 

I paired my stamp with yesterday's stamps to create a tag.  I stamped my image then added color. I then re stamped over the paint. 

It's  a cool small stamp that will be great for ATCs.
A close up of the tag background using my freebie images. If you haven't tried carving, these are great for beginners. 


Tuesday, October 28, 2014

Stamp Carving Week Day 3

Carving up a storm! On Tuesday during the Kraaft it Live show, I drew and carved this fun stamp. I used the speedball speedy cut for the first time and I have to admit, I'm not a fan. It was too soft for my preference. I also noticed that it crumbled a lot. Even now after I'm done with it, if I run my hand over the block,I get a grainy texture flake off. Other than that, I love my new stamp that will go great on a journal page.
On yesterday's blog, I offered some images to try carving. I decided to carve my flower ones. I've been wanting one of these layer stamps. I love how easy they make it to add color. I used CTMH inks ( pear, pixie, cotton candy and topiary)

I took my stamps and paired it up with yesterday's eraser stamp to create this sweet tag.


An finally a bonus:  I took a dollar store shaped eraser and carved on it. I was surprised that it was a bit harder to carve but once I got my pressure correctly, I managed to create an animal face. Stay tuned because I have a plan for this cutie. 

Stamp Carving Week. Day 2

I came across a mixed media piece that I just fell in love with on Pinterest. So I decided to use it as my stamp inspiration for today. Live Stamp Carving TODAY!!!  (1pm central) @ the Kraaft Shaak

I used a large eraser as my carving block.  I drew directly onto my eraser with a sharpie.  I darkened my final lines when I was happy with my image.

Carving an eraser is easy however, the texture is a bit different than stamp carving blocks such as speedy carve. I've noticed that it's a bit crumbly, when making small cuts or short strokes it sometimes falls apart. So I find myself having a hard time cleaning up smaller areas.

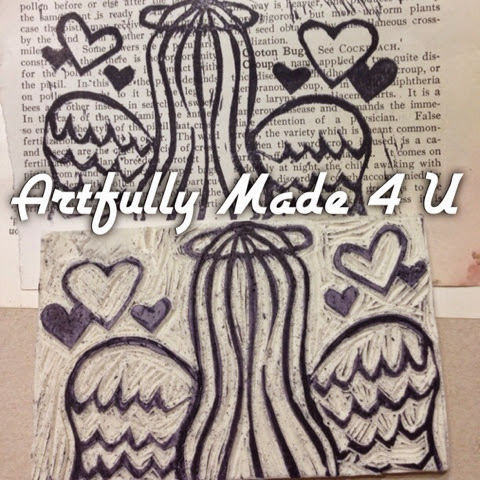
My stamp and test. I really love this style of faceless stamps. I can now stamp on an art journal or use it on book text pages. I hope I've done my Pinsperation justice. 

Want to give stamp carving a try? Here are some original art freebies you can use to carve up some fun stamps. Enjoy!


Monday, October 27, 2014

Stamp Carving Week Day 1

I love stamps! There is just something about being able to take an image you like and placing it anywhere you want.   I guess it's very similar to when we first discover writing; we have this innate urge to write everywhere.  Stamps just takes things to the next level. You can leave your mark with an image you love or you've created.  I enjoy stamps and stamp carving so much that I will be doing it LIVE tomorrow 1 central at KraaftShaak.com join us. 

When I first started carving, I wasn't sure if it was going to be something I would enjoy. So, I went to my local Hobby Lobby and picked up a basic carving tools set for $6 and some erasers at my local Dollar Tree. I practiced on the small erasers until I felt I was ready for the "fancy" Speedball Speedy Carve. 

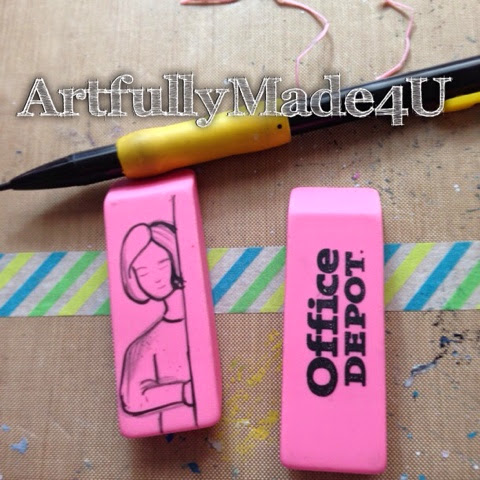
The giant erasers make a great carving base. I like to draw directly onto my easer when I don't have to worry about the orientation of my image. Since the giant erasers have some words on it, a white or silver marker might work better to help you see your image on those areas. I didn't have a huge problem with this. It just took a bit of focus. 


I carved around my image and cleaned it up as much as I felt comfortable with. Since it's a hand carved stamp, I'm ok with it not being a clean image when stamped. I think the missed lines give it character. The erasers are very easy to carve, it's very soft so it doesn't take a lot of effort or pressure to get your lines carved. 

I created a tag to test out my stamp. It's a great way to see how it will look. 

The great thing about the giant erasers is that they are thick. This means you can get a stamp on both sides. So I flipped it over and created a second stamp on the same eraser.
I tested my stamp out by stamping it onto some textbook page. I then added it onto my tag.  I love this look. It's perfect for this stamp.

My tags side by side. I love that with $1 I can get two unique large stamps. 

I will be devoting all week to stamps. So, grab some erasers and join us Live tomorrow!  I will also have some original line images that you can use to carve tomorrow. 


Sunday, October 26, 2014

My Style Stamps pocket page kit

I created a fun card using the pocket page kit from my style stamps. 
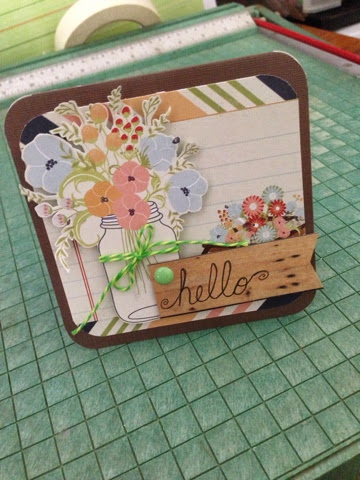
The pocket kit I'm using has a camping rustic theme. So I used the paper assortment to create a card. I cut out one of the cards that had a flower bouquet. I then layered two of the smaller cards to create my background. I tied some twine around my jar and added a sentiment on a wood piece of paper. Everything was taped down rith foam tape for dimension. I love how the card came together. The pocket page kits aren't just for scrapbooking! 

Thursday, October 23, 2014

My Style Stamps pocket page kit


I was given the opportunity to play around with one of the pocket page kits that My Style Stamps sells. It's a great mix of items for $10.
I've dabbled in scrapbooking but, like many I got overwhelmed with the materials and actually printing pictures. I have boxes of pictures that I've told myself "someday I'll scrapbook them." So, when pocket scrapbooking became a thing I thought this would be a great way to start things off again. 
 For this layout I used a pocket protector from Colorbox. I liked that it has different size openings. i used Pacifica Ink from CTMH to add some blue to my base page. I used some green dot washi tape to tie the pages together.
Close up of focal layout. 
Over all I'm happy with the layout. I left room for lots of journaling both in the top tag and on the white space by the picture.


Monday, September 22, 2014

My quest for coffee continues...

We haven't made it a priority to stock up on coffee. There are no kcups to be found in our house.  We are having to get creative and actually use up our reserve. You know, the one you drink only if you have to! The type that's gifted to you, or left behind by a house guest. Needless to say, there are some interesting choices. 
As I sampled away some coffee, I decided I needed another coffee stamp. 

This time, I went with a mug complete with some steam and coffee beans.
I then created a tag to showcase my stamp. I made a border with the beans and paper pieced my mug. I was also able to fit in a sentiment from the CTMH free stamp set. It's free this month with a 30 dollar purchase. 

Tuesday, September 16, 2014

A KIT Saturday

This past Saturday, I participated in a Kraaft it together Live Google hangout.  I met via the internet with some crafting friends from the Kraafters Kommunity on Google plus. It's a fun concept, eveyone turns on their computers and works on a craft project. It's a great way to chat and share.  During this time, I carved a few stamps.
It's a layer stamp set. The first layer is an outline stamp.

The second layer is some Inside detail. 
Finally a center stamp
When placed together, they create a very cool flower. I was very pleased with my final results but it was a bit of a challenge trying to remember how to line up my images. If you want to try this out, I recommend using simple shapes that can be lined up easily. 

Coffee Time


We ran out of coffee and I found myself really wanting some. So I got creative and made a stamp instead.
I drew a coffee cup using a Google image as my reference.
I then rubbed my image onto some Speedball Speedy Carve to transfer my drawing. It doesn't take much pressure to do this. Once I had my image transferred, I was able to begin carving using my carving tools.
Once I had the majority of my lines carved, I stamped to see where I still needed to continue carving and cleaning up areas.
My final product, still with a few areas that could be cleaned up, but I like that they let you know it's hand carved. 

 Total carving time was an hour since it had simple lines.  A quick card I created using this stamp. I might need to create a phrase or sentiment to go with it. For now I hand-wrote my sentiment.
What do you think? Now to find some real coffee!