Monday, April 20, 2015
Sunday, April 19, 2015
Sunday, April 12, 2015
A KIT Saturday ... It's been a while!
It is the first Saturday of the month and that means that it's Kraaft it Together at KraaftShaak.com, a virtual crafting meet up. The best part is you don't have to pack your supplies up and haul them around. I haven't had a chance to participate in one of these events in a while. I know I'm missing out on the great fun! This day never disappoints with lots of laughter and sharing of ideas and know how. All the Kraafters involved are a true joy to hang out with. So here is what I worked on during this event.


I created a stamp. I wanted something to represent sisters or friendship. I drew two girls without facial features leaning their heads towards each other. When I was happy with my drawing, I transferred it to my carving rubber. All you have to do is turn it over and rub it with a finger or bone folder.

Then I just carved out the areas. I knew this was an outline stamp, so I just carved everything. that wasn't drawn.
I stamped it a few times until I was happy with how it looked. My final stamping was done on a piece of book text that I had used to lift off some paint from a previous project. I think that the two combined make a great image! The message is evident!
Sister, Friendship, LOVE!
I also got my small 2x3 gelli plate and created a few backgrounds. My intention is to use them as envelopes. They will be combined with my stamp soon and turned into mail art.
Of course I had to draw on some of my backgrounds. I practiced a few faces with Neo color II. This one I liked a lot.
This one not so much. I wasn't happy with the hair. And it seemed too dark.
If you ever want to join a virtual art meet-up, join us at the Kraafters Kommunity on Google plus. They are totally worth it!
Thursday, April 9, 2015
My Peanuts Obsession

Plastic sleeves, like large envelopes.

Not one but two mini letter sets! These things are super cute. Complete with mini envelopes.


Shaped binder clips!
Sticky flags.
A notepad collection. It's has a variety of sticky notes and flags.
Inside view 
 A mini book of sticky flags.
Note pad.
A mini book of sticky flags. Inside view
And more flaps.
I also got a few edible goodies. A tin that had chocolate chip cookies those were gone as soon as I opens it. They were yummy! Now I just have the awesome tin bucket.
A Snoopy bank, this came with m&m style candies except the coating is very thick and crunchy. Check out the packaging!!
Inside view
A small bento container it came with candies as well.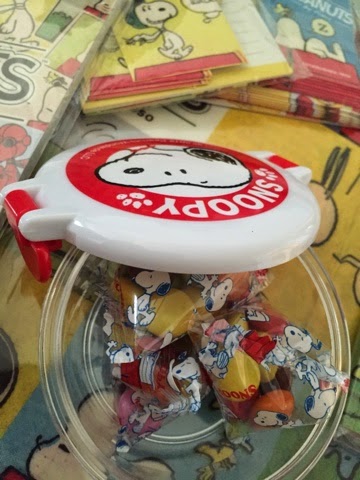
Finally the OMG moment.... Woodstock candy box.
Inside view
It should be a crime to eat these beauties! Luckily, I have a back up box.
I look at this stuff and can't help but smile! I dare anyone to see the colors of the Peanuts gang and not smile.
Wednesday, April 8, 2015
Pieces of Me... Vol. 1
Playing with masking fluid. This was fun, although waiting for it to dry...not so much.


Loved this poster I created! The colors just make me happy! Using masking fluid as well.
Playing with text. I like to practice my handwriting every now and then using a brush.


In my art you will find pieces of me. I never know what I'm going to create or what it will look like. I like to spend some time looking at my background until I see someone looking back at me. You know those people that claim to see something in their toast?! Yeah that's me! I guess my cloud-watching days are paying off.

Mail art with some handwriting on a gelli print background.
A post card
I joined a cardboard post card swap. So I played around with cardboard. I love all the texture!
More cardboard.
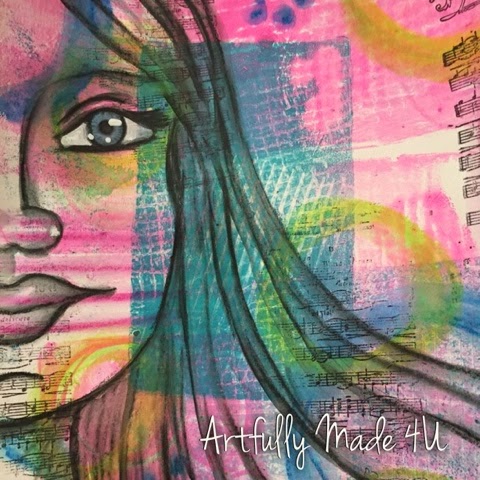
I see faces!!! Most of my art is pulled art from backgrounds that I create. I like to pull out the faces that are hiding in the backgrounds.
I just LOVE this one! Face on mixed media paper.
Face on canvas with intktense. She's a ginger beauty.
A color challenge and she emerges!
Tuesday, April 7, 2015
Cascarones
Growing up I never understood why people would dye hard boiled eggs. You hide real eggs?! That was so hard for me to comprehend. In our house we didn't get the whole egg. We were only given the egg shells. We saved them up the week before Easter. And we used the egg shells to make Cascarones confetti-filled eggs.
We never seem to remember to save the shells in time, but this year we were able to get about 2 dozen egg shells, which is plenty for our Easter fun.


Before we can play with them, we have to decorate them a bit. I decided to draw on them with a sharpie. What else? But my favorite character: Snoopy!
I only had blue and red dye, so I didn't have many options for color. I made it work. After the egg shells got some dye, we filled them with confetti and added some tissue paper as a cap. These are going to get cracked, so it's ok that they are not perfect.
Once the eggs are done, they are ready for hiding. The more you find, the more you will have to crack on someone's head. Having an egg cracked on your head is supposed to mean good luck. I've never thought about the meaning of the tradition of ours. I just remember it as a fun time spent with my siblings.
Monday, April 6, 2015
You are Unique... Embrace it!
Spark Some Kreativity Saturday @The Kraaft Shaak
I'm honored to be heading a new venture at the Kraaft Shaak. This post marks the first installment of Spark Some Kreativity Saturdays. A design team has been assembled by Heather at the Kraaft Shaak, and will be coming to you every Saturday with unique project and ideas that we hope will "Spark Some Kreativity".
Recently, I've been feeling "unartistic"...yes, it's a word I just made up. My inner critic has been out in full force. I find myself questioning my talent or lack there of. So, when I got my hands on the Mixed Media kit , I challenged myself to create something that could help me get out of my mental rut. My kit came with a Kraft canister and so many fun goodies. I was blown away by all the items that come in the kits. It truly is a fun way to get a feel for mixed media. One of the unique features of these kits is that you can pick two sample items to play with, a paint and a medium. However, I opted to let Heather surprise me and pick my samples. I truly got a mystery box.


After a few days of thinking of what to do with the container, I decided that it would make a wonderful motivation/inspiration bank. So with a box of mystery items, I decided to embrace the color that I would not otherwise chosen as my first choice. It's golden chalk paint by Prima. I gave the container two quick coats of yellow paint. Boy, was it yellow. Like I said, yellow is not my go to color. I went all in and used it as my base color. This choice proved to be a of a bit challenge later.
I used some archival ink in black to stamp some music notes throughout using a stamp from my stash. I then got a bit ahead of myself and used texture paste with a doilie stencil. I soon realized that the colored texture paste would get in the way of the colors I was going to add. So I had to painfully scrape away the paste. It was painful because I really loved the color I had achieved.

After taking off the texture paste, I used some distress paint to add some more color. I found out that chalk paint as a base coat doesn't necessarily play well with others. My distress paint floated on top of the chalk paint and if I moved it too much, it would just come off. So, I had to be careful. I found that it worked best when I dried the top layers as I was adding new colors. The kit included a square of corrugated paper. I used it to add more texture and layers onto my piece in pink.
Once I was happy with my background, I used a dictionary page from the kit to add some interest on half of my container. I then doodled and added some text.
On the side where my text layer ended, I decided to add a face or half of a face. This also proved to be a bit of challenge on my chalk paint base. My inktense colors would come right off if I used too much water. It took some patience, but I got it looking semi-decent.
Once my main elements were in place, I worked on some fun details. I mixed some Flat Magicals with some black sand texture paste to create a color that complimented my background.
I then used a die cut sheet from the kit as a stencil. Since I was working with a cylinder, it was challenging to get a stencil to bend. The paper ended up being a great stencil for this job. I held its shape and did the job.
I've never used black sand texture paste. It's grainy like sand, but sharp like glass. It gave some interesting texture, and it took on the color beautifully.

My intention for this item was to create a bank to add quotes, inspirational or motivational messages to myself. So, I cut an opening on the top, and this allows me to add to it when I feel like I'm being hard on myself. When my inner critic speaks up, I will make an effort to shout back.."I am unique, I am talented!"
I hope this Sparks Some Kreativity and you find a way to create a "happy bank" of your own. Please visit the Kraaft Shaak Design Team page every Saturday for a new "Spark" every week.
Materials Used:
Tim Holtz Distress Paint :
Subscribe to:
Posts (Atom)